When automating SharePoint processes with Power Automate, it is common to encounter scenarios where a flow needs to pause until a specific field value changes — for example, waiting until a document is approved or a status column changes to “Completed.”
Power Automate: How to Wait Until a SharePoint Field Changes Its State
1. Introduction
When automating SharePoint processes with Power Automate, it is common to encounter scenarios where a flow needs to pause until a specific field value changes — for example, waiting until a document is approved or a status column changes to “Completed.”
However, if implemented incorrectly, this logic can cause infinite loops or excessive flow runs. This article explains the correct and safe way to make a Power Automate flow “wait” for a SharePoint field to change state, without using “When an item is modified” triggers.
2. The Problem with Using “When an item is modified”
A frequent mistake is to design flows that are triggered both when an item is created and when it is modified, while also including “Update item” actions inside the same flow.
This leads to recursive self-triggering, where each update causes the flow to start again indefinitely.
Example of a bad design
- Trigger: When an item is created or modified
- Actions:
- Update the same item (e.g., change the status or a timestamp)
Result: The update triggers the flow again, creating an infinite loop.
To avoid this, you should:
- Use the trigger “When an item is created” only.
- Implement a waiting logic using “Do Until” and “Get item”.
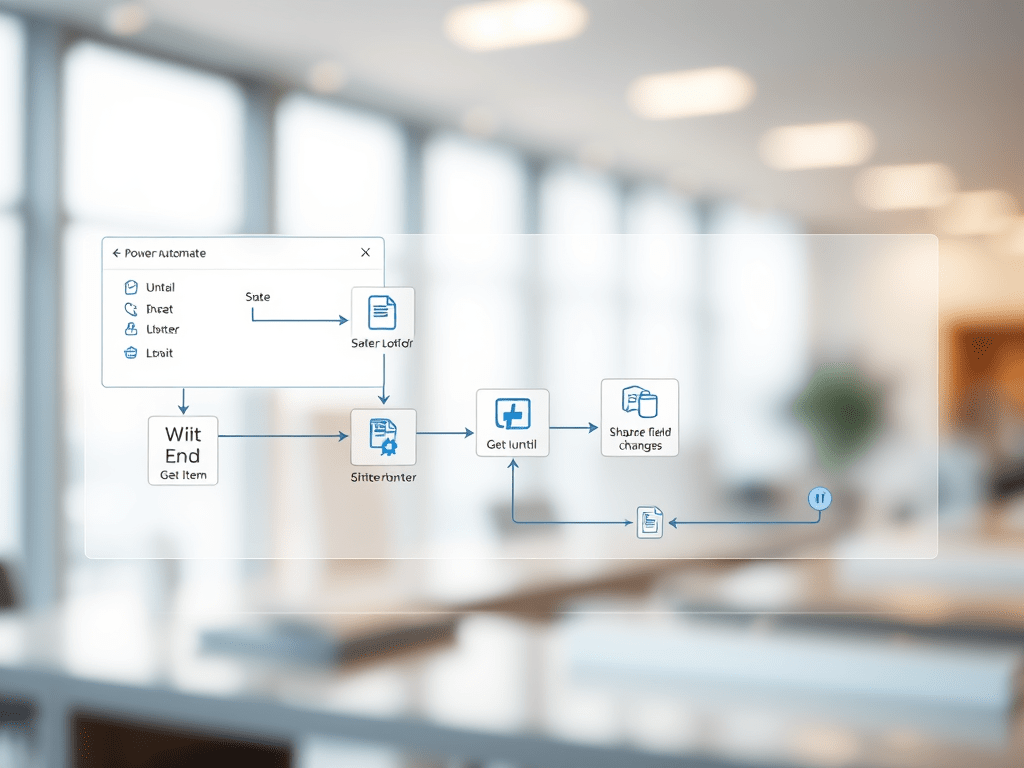
3. Correct Design Pattern: “Do Until” Loop with “Get item”
This approach allows the flow to periodically check whether the SharePoint field has changed, without triggering new runs.
3.1 Step-by-Step Implementation
Step 1 – Trigger
- Use “When an item is created”.
- Store the
ID,Site Address, andList Namefrom the trigger output.
Step 2 – Get the Item
Add the “Get item” action:
- Site Address: same as trigger
- List Name: same as trigger
- Id: use
IDfrom trigger
This retrieves the item to monitor.
Step 3 – Do Until Loop
Add a “Do until” action and set the condition:
@equals(items('Get_item')?['Status'], 'Approved')
Replace 'Status' and 'Approved' with your column name and target value.
Step 4 – Add Delay and Recheck
Inside the loop:
- Add a “Delay” action (e.g., 5 minutes).
- Add another “Get item” action to re-fetch the latest value.
This loop will pause, wait, and re-check periodically until the field meets the condition.
Step 5 – Configure Loop Settings
In the Settings of the “Do until” action:
- Count: set a maximum number of iterations (e.g., 60)
- Delay: set to 5 minutes
This means the flow will wait up to 5 hours before timing out.
Step 6 – Continue the Process
After the “Do until” block, place any actions that should execute once the field reaches the desired state (e.g., send email, update status, call another flow, etc.).
4. Example Flow Structure
| Step | Action | Purpose |
|---|---|---|
| 1 | When an item is created | Start the flow once per item |
| 2 | Initialize variable (optional) | Store ItemID for reuse |
| 3 | Get item | Read current field value |
| 4 | Do until | Wait until Status = “Approved” |
| 5 | ├ Delay | Pause before next check |
| 6 | └ Get item | Refresh the field value |
| 7 | Continue with next actions | Execute after condition met |
5. Technical Considerations
| Aspect | Recommendation |
|---|---|
| Trigger | Always use “When an item is created” to avoid recursion |
| Field type | Use simple text or choice fields for comparisons |
| Loop interval | 5–10 minutes is ideal for near-real-time waiting |
| Maximum iterations | Define limits to prevent endless waiting |
| Timeout handling | Add conditions after the loop to handle “not reached” scenarios |
| Performance | Avoid overly frequent “Get item” calls — they count toward API limits |
| Calculated fields | Avoid using them in conditions — Power Automate doesn’t detect real updates |
6. Optional: “Wait for an approval” Action
If the field changes as a result of an approval process, Power Automate provides the “Start and wait for an approval” action.
This built-in action suspends the flow until the approval response is received — eliminating the need for a custom loop.
However, for general field monitoring, the Do Until + Get item pattern is the best option.
7. Example Expression
To compare a SharePoint Choice field:
@equals(items('Get_item')?['Status']?['Value'], 'Approved')
To compare a Text field:
@equals(items('Get_item')?['Status'], 'Approved')
8. Common Mistakes and How to Avoid Them
| Mistake | Impact | Solution |
|---|---|---|
| Using “When an item is modified” + “Update item” | Infinite loop | Use “When created” only |
| Missing delay in loop | API throttling | Always add “Delay” |
| Unbounded loop | Flow never ends | Configure iteration limits |
| Checking calculated field | Condition never met | Use text or choice fields only |
| Complex filter logic | Wrong comparison | Simplify to a single field check |
9. Testing and Monitoring
During testing:
- Create a new item manually.
- Let the flow start and monitor in Power Automate Run History.
- Change the SharePoint field manually.
- Observe that the flow resumes automatically after the next “Get item” cycle.
Use “Peek code” in each step to debug the expressions if needed.
10. References
- Loop control in Power Automate (Do until)
- Delay and Delay Until actions
- Avoid infinite triggers in Power Automate
- Wait for an approval action
11. Summary Table
| Concept | Description |
|---|---|
| Pattern | “Do until” + “Get item” + “Delay” |
| Trigger | When an item is created |
| Purpose | Wait until a SharePoint field changes |
| Advantages | Prevents recursion, provides controlled waiting |
| Typical Use Case | Status field transitions (“Pending” → “Approved”) |
| Alternative | “Wait for an approval” (if applicable) |
12. Conclusion
Using “Do Until” loops with “Get item” actions provides a safe and controlled way to make Power Automate wait until a SharePoint field changes its state.
This pattern avoids the dangerous recursion that occurs with “When an item is modified” triggers and ensures that your automation logic remains predictable, efficient, and compliant with Microsoft’s best practices.
