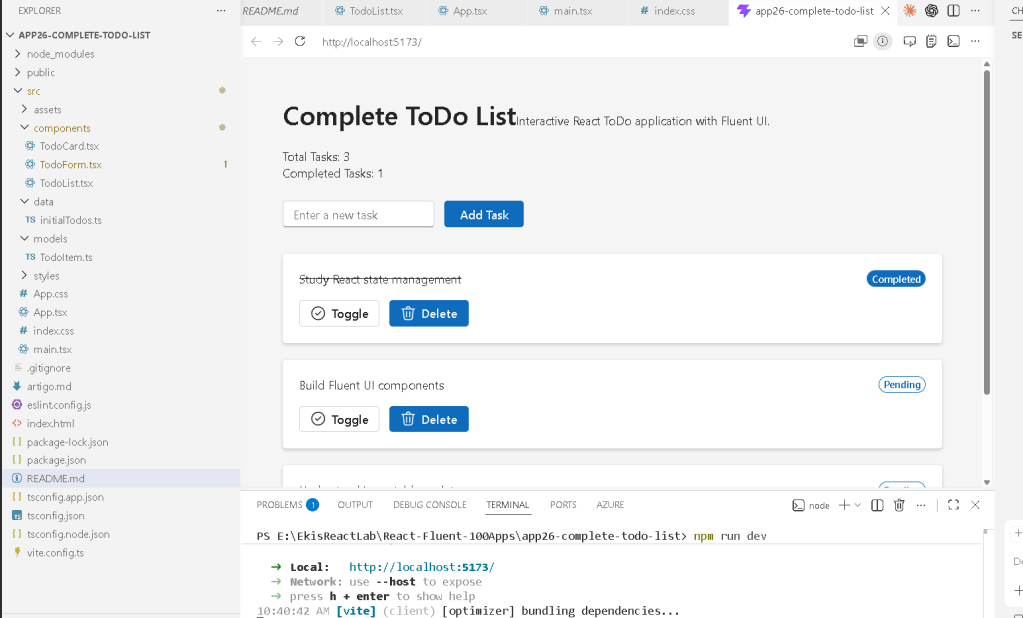
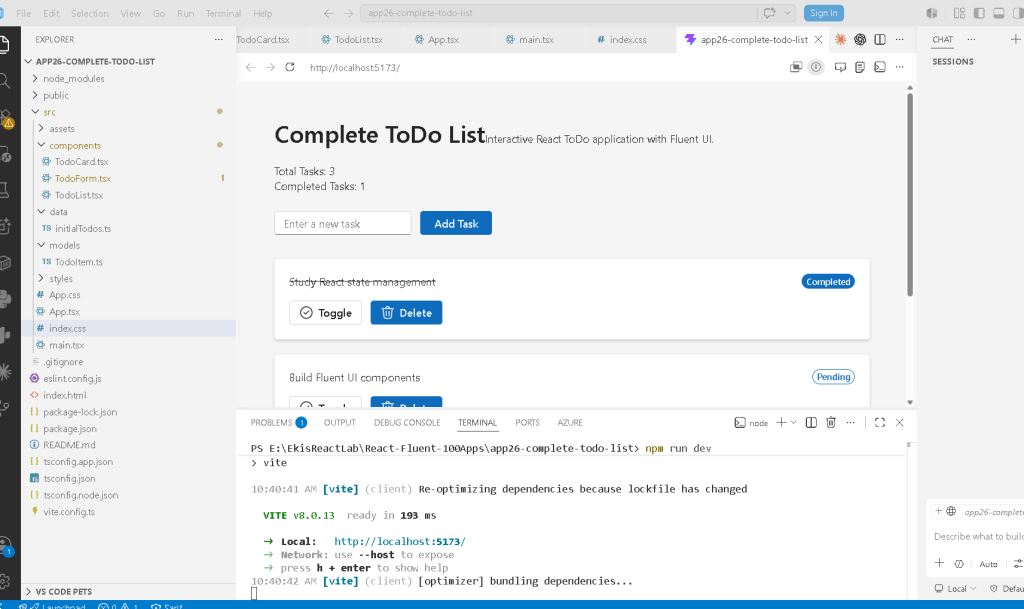
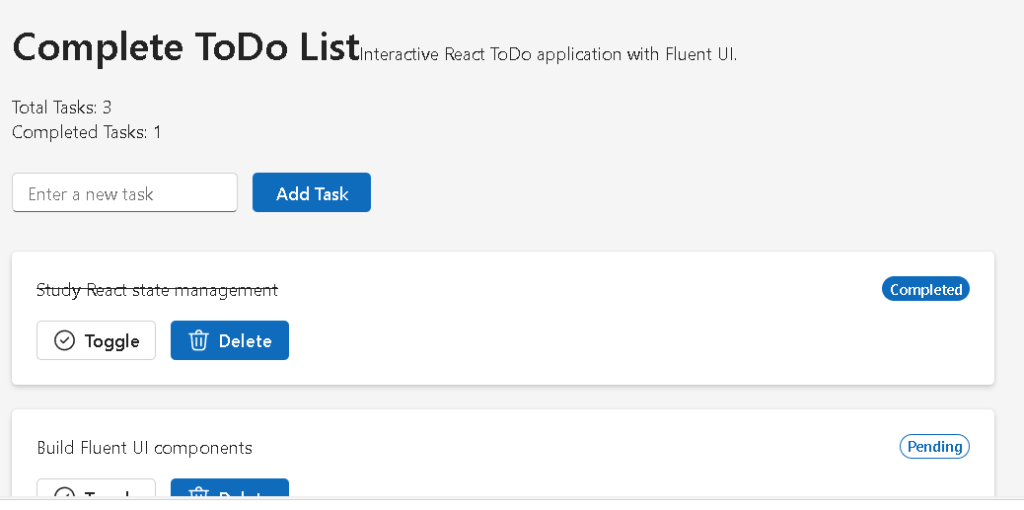
Building a Complete Interactive ToDo List with React, TypeScript, Vite, and Fluent UI
Modern React development is not only about displaying static interfaces anymore. Real applications require interaction, state management, dynamic rendering, user input handling, and predictable UI updates. One of the best exercises to truly understand the React mental model is building a complete ToDo application.
At first glance, a ToDo List may appear simple. However, architecturally it introduces some of the most important concepts in the React ecosystem:
- component state
- controlled inputs
- immutable updates
- event handling
- rendering dynamic arrays
- derived state
- parent-child communication
- reusable components
- declarative rendering
In the roadmap of the React + Fluent UI 100 Apps project, App 26 represents the transition from static interfaces into truly interactive applications. According to the project structure, this application belongs to Block 2 — Interactivity and State and focuses specifically on updating arrays in React state.
This app is important because it teaches the correct React mental model:
The UI should always be derived from state.
Instead of manually manipulating the DOM like jQuery or vanilla JavaScript approaches, React applications describe what the UI should look like based on the current data.
The ToDo application becomes an ideal laboratory for understanding this philosophy.
Why This Application Matters
The ToDo List is one of the most famous learning projects in frontend development because it naturally introduces many essential concepts:
| Feature | React Concept |
|---|---|
| Add task | Updating arrays |
| Delete task | Filtering arrays |
| Toggle completion | Immutable object updates |
| Input field | Controlled components |
| Task count | Derived state |
| Empty state | Conditional rendering |
| Task cards | Component composition |
Even though the UI itself may seem small, the architecture behind it is foundational for nearly every professional React application.
Systems such as:
- dashboards
- CRMs
- ERP platforms
- SharePoint portals
- Microsoft 365 admin apps
- task management systems
all use the same architectural principles introduced here.

The Development Environment
This application uses the same enterprise-ready stack adopted throughout the project:
| Technology | Purpose |
|---|---|
| React | Declarative UI library |
| TypeScript | Static typing |
| Vite | Fast development tooling |
| Fluent UI | Microsoft design system |
| Node.js | JavaScript runtime |
| VS Code | Development environment |
Official documentation:
Creating the Project

The project starts with Vite.
cd C:\ReactAppsmkdir bloco02cd bloco02npm create vite@latest app26-complete-todo-list -- --template react-tscd app26-complete-todo-listnpm install
This command automatically creates:
- React configuration
- TypeScript configuration
- Vite development server
- project scripts
- folder structure
The react-ts template is extremely important because it activates TypeScript support from the beginning.
TypeScript improves:
- maintainability
- scalability
- IDE support
- architecture safety
- refactoring confidence
Installing Fluent UI
The application uses Microsoft Fluent UI as the visual layer.
npm install @fluentui/react-components @fluentui/react-icons
Fluent UI provides:
- accessibility
- enterprise design consistency
- Microsoft visual standards
- keyboard support
- typography system
- enterprise-ready components
Without Fluent UI, all visual controls would need to be manually styled.
Creating the Folder Structure

The project follows the architecture pattern established across the 100-app roadmap.
mkdir src\componentsmkdir src\modelsmkdir src\datamkdir src\styles
This structure separates responsibilities:
| Folder | Responsibility |
|---|---|
components/ | UI building blocks |
models/ | TypeScript interfaces |
data/ | mock or static data |
styles/ | CSS organization |
This organization becomes critical in enterprise applications where projects can grow to hundreds of files.
Understanding the Todo Model

The first important architectural file is:
src/models/TodoItem.ts
export interface TodoItem { id: number; title: string; completed: boolean;}
This interface defines the shape of every task.
React applications become significantly easier to maintain when data structures are clearly defined.
This model guarantees that every task must contain:
idtitlecompleted
This prevents mistakes such as:
title: 123
because TypeScript immediately warns about invalid data types.
This is one of the reasons modern enterprise React development strongly prefers TypeScript.
Static Initial Data
The file:
src/data/initialTodos.ts
contains mock data.
export const initialTodos: TodoItem[] = [
This simulates what later may come from:
- REST APIs
- Microsoft Graph
- SharePoint
- databases
- local storage
The important React principle introduced here is:
The UI should be generated from data.
Instead of manually writing repeated HTML blocks, React dynamically renders the interface from arrays.
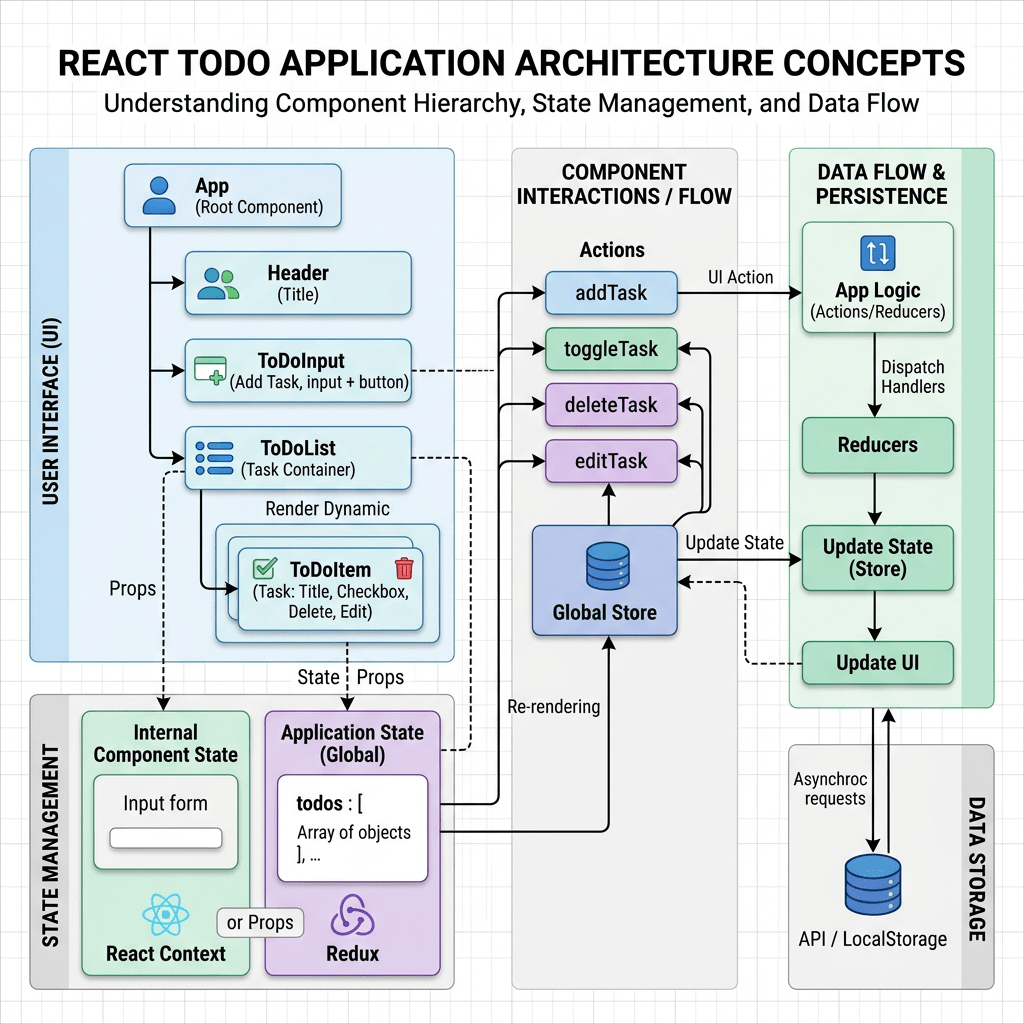
Understanding Component Composition
The application architecture is:
App TodoForm TodoList TodoCard
This is one of the core concepts of React:
Composition
Instead of giant monolithic files, React applications are composed of small reusable components.
Each component has one responsibility.
Understanding TodoForm
The component:
TodoForm.tsx
introduces one of the most important concepts in React:
Controlled Inputs
Inside the component:
const [title, setTitle] = useState("");
React creates component state.
According to React Learn:
State is a component’s memory.
The variable:
title
stores the current value.
The function:
setTitle
updates the value.
Understanding useState
The syntax:
const [title, setTitle] = useState("");
is called array destructuring.
React returns:
- current state value
- state updater function
Conceptually:
useState("") ↓returns: current value update function
This is one of the most important React patterns.
Understanding Controlled Components
The input field uses:
value={title}
This means the input value comes directly from React state.
When the user types:
onChange={(event, data) => setTitle(data.value)}
the flow becomes:
User types ↓onChange event fires ↓setTitle updates state ↓React re-renders ↓Input receives updated value
This is completely different from imperative DOM programming.
React controls the input through state.
Why React Uses Controlled Inputs
Controlled inputs provide:
- predictable behavior
- centralized state
- easier validation
- easier synchronization
- easier debugging
This architecture becomes critical in:
- login forms
- enterprise forms
- dashboards
- SharePoint forms
- admin systems
Understanding the Add Task Logic
Inside the form:
function handleSubmit() {
the app validates the input:
if (title.trim() === "") { return;}
This prevents empty tasks.
Then:
onAddTodo(title);
calls the parent callback.
This demonstrates another important React concept:
Parent-to-child communication through props.
The parent owns the state.
Children request changes through callback functions.
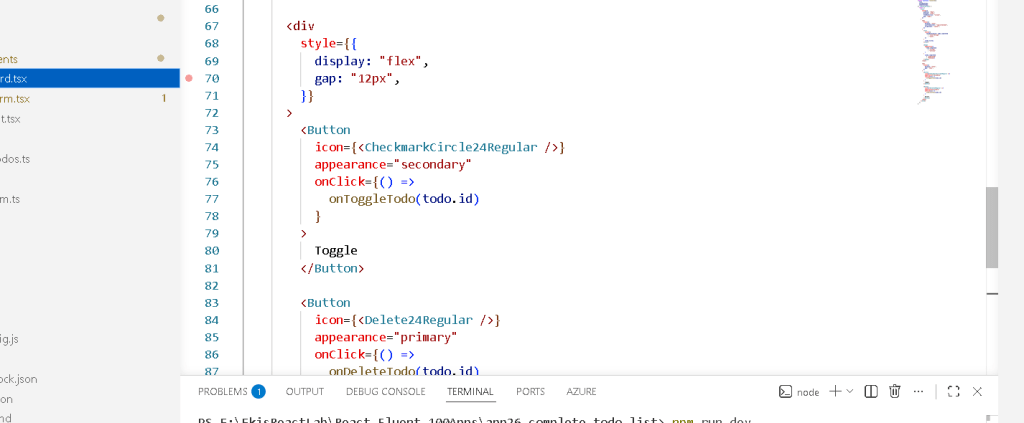
Understanding TodoCard
The TodoCard component receives:
todoonToggleTodoonDeleteTodo
through props.
This component only displays the UI.
It does not own the state.
This is extremely important architecturally.
React applications often follow:
Parent owns stateChild renders UIChild requests updates
This improves:
- predictability
- debugging
- maintainability
Understanding Conditional Styling
The task title uses:
textDecoration: todo.completed ? "line-through" : "none"
This demonstrates declarative UI.
The interface automatically changes depending on data.
If:
completed = true
React renders:
line-through
Otherwise:
normal text
No manual DOM manipulation exists.
Understanding Conditional Rendering
The badge:
{todo.completed ? "Completed" : "Pending"}
demonstrates conditional rendering.
React can render different UI based on conditions.
Official documentation:
Understanding TodoList
The TodoList component introduces array rendering.
todos.map((todo) => (
This transforms data into UI.
Conceptually:
Array of tasks ↓map() ↓Array of components ↓Rendered UI
This is declarative rendering.
Instead of manually creating DOM nodes, React describes the desired interface.
Why Keys Matter
Inside the list:
key={todo.id}
Keys help React identify items efficiently.
Without stable keys:
- React may re-render incorrectly
- performance decreases
- warnings appear
Keys are essential in dynamic lists.
Understanding Empty State Rendering
if (todos.length === 0)
renders an alternative UI.
This introduces:
Empty State UI
Professional applications must handle cases where data does not exist.
Examples:
- no tasks
- no users
- no reports
- no notifications
Understanding the Main App Component
The root state lives inside:
App.tsx
const [todos, setTodos] = useState<TodoItem[]>(initialTodos);
This state represents the entire task collection.
Understanding Immutable Updates
This is the MOST IMPORTANT concept in the entire application.
React requires immutable state updates.
Wrong Approach ❌
todos.push(newTodo)
This mutates the existing array.
React does not want direct mutations.
Correct Approach ✅
setTodos([ ...todos, newTodo,]);
This creates a completely new array.
React detects:
new reference
and re-renders the UI.
Understanding the Spread Operator
...todos
copies all previous items.
Then:
newTodo
is appended.
Result:
old items + new item
This immutable approach is fundamental in React architecture.
Understanding Toggle Logic
The toggle feature uses:
todos.map((todo) => {
When the correct task is found:
return { ...todo, completed: !todo.completed,};
This creates:
- new object
- new array
Again:
No direct mutation.
This predictability is one of React’s biggest architectural advantages.
Understanding filter()
Task deletion uses:
todos.filter((todo) => todo.id !== id);
This creates a new array without the removed item.
The original array remains untouched.
Understanding Derived State
The app calculates:
const completedTasks = todos.filter((todo) => todo.completed ).length;
This value is NOT stored in state.
It is derived from existing state.
React Learn strongly recommends avoiding duplicated state.
Official concept:
Understanding React Rendering Flow
The rendering cycle becomes:
User clicks button ↓Event handler executes ↓setTodos updates state ↓React re-renders components ↓UI automatically updates
This is the declarative React model.
Why No useEffect Exists Yet
This application intentionally avoids:
useEffect
because no external synchronization is required.
According to React Learn:
Effects should synchronize with external systems.
Since this app only manipulates internal UI state:
- effects are unnecessary
- state alone is enough
This is extremely important because beginners often overuse useEffect.
Understanding Fluent UI in This App
The application uses:
ButtonCardBadgeTextInput
from Fluent UI.
This provides:
- accessibility
- consistent spacing
- Microsoft visual identity
- keyboard navigation
- responsive styling
Fluent UI dramatically reduces manual CSS work.
Why This App Is Architecturally Important
This ToDo application introduces nearly every foundational React pattern needed for modern frontend engineering.
After mastering this app, the same concepts scale into:
- enterprise dashboards
- admin portals
- CRM systems
- SharePoint interfaces
- Power BI-like apps
- Microsoft 365 experiences
The UI complexity may grow, but the mental model remains the same.
Technical Summary
| Concept | Purpose |
|---|---|
useState | Component memory |
| Controlled Inputs | React-controlled form fields |
| Immutable Updates | Safe state changes |
map() | Array rendering |
filter() | Removing items |
| Spread Operator | Copy arrays/objects |
| Props | Component communication |
| Callback Functions | Child-to-parent interaction |
| Conditional Rendering | Dynamic UI |
| Derived State | Calculated values |
| Fluent UI | Enterprise design system |
| TypeScript | Static typing |
| Vite | Modern tooling |
Official Documentation
React
- React Learn
- State: A Component’s Memory
- Updating Arrays in State
- Responding to Events
- Conditional Rendering
- Rendering Lists
- Choosing the State Structure
Fluent UI
Vite
TypeScript
Current Project Progress
| Block | App | Name | Status |
|---|---|---|---|
| Block 1 | 01 | Hello React Fluent | Completed |
| Block 1 | 02 | Profile Card | Completed |
| Block 1 | 03 | Product List | Completed |
| Block 1 | 04 | Microsoft Style User Card | Completed |
| Block 1 | 05 | Static Dashboard | Completed |
| Block 1 | 06 | Corporate Sidebar Menu | Completed |
| Block 1 | 07 | Visual Task List | Completed |
| Block 1 | 08 | Timeline Events | Completed |
| Block 1 | 09 | Employee Table | Completed |
| Block 1 | 10 | Email List | Completed |
| Block 1 | 11 | Grid of Cards | Completed |
| Block 1 | 12 | Image Gallery | Completed |
| Block 1 | 13 | Movie Catalog | Completed |
| Block 1 | 14 | Football Teams | Completed |
| Block 1 | 15 | News Page | Completed |
| Block 1 | 16 | Financial Dashboard | Completed |
| Block 1 | 17 | SharePoint Layout | Completed |
| Block 1 | 18 | File Explorer | Completed |
| Block 1 | 19 | Corporate Portal | Completed |
| Block 1 | 20 | Microsoft Landing Page | Completed |
| Block 2 | 21 | Modern Counter | Completed |
| Block 2 | 22 | Toggle Theme | Completed |
| Block 2 | 23 | React Calculator | Completed |
| Block 2 | 24 | Login Form | Completed |
| Block 2 | 25 | User Registration | Completed |
| Block 2 | 26 | Complete ToDo List | Current |
| Block 2 | 27 | Shopping List | Next |
