
Technical Blog Article — App 35: BMI Calculator with React, TypeScript, Vite, and Fluent UI

The BMI Calculator is one of the most important applications in the entire learning roadmap because it introduces one of the core principles of modern React:
Derived values should be calculated during rendering instead of duplicated in state.
This application belongs to Block 2 — Interactivity and State, where the roadmap focuses on:
useState- controlled inputs
- forms
- events
- derived state
- validations
- dynamic rendering
The official project structure defines App 35 as:
35. Calculadora IMC / BMI Calculator
inside the interactivity block.
The application appears simple visually, but architecturally it introduces several extremely important React concepts:
- component memory
- controlled forms
- derived calculations
- render cycle
- numeric conversion
- TypeScript typing
- separation of responsibilities
- utility functions
- enterprise UI composition
This app is also a perfect demonstration of React’s declarative philosophy.
Instead of manually updating HTML elements, React recalculates the interface automatically whenever state changes.
The Goal of the Application
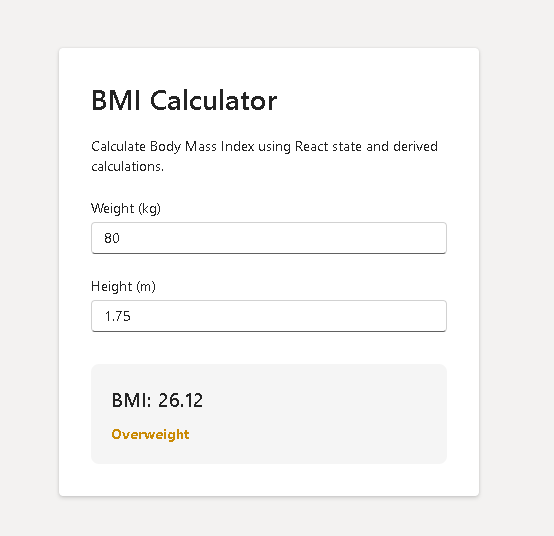
The BMI Calculator allows the user to:
- enter weight
- enter height
- calculate BMI automatically
- see a classification dynamically
- view enterprise Fluent UI styling
The application demonstrates that React UI is always derived from state.
Understanding BMI
BMI means:
Body Mass Index
The formula is:
BMI = \frac{weight}{height^2}
Where:
- weight = kilograms
- height = meters
Example:
BMI = \frac{80}{1.75^2}
The result determines categories such as:
| BMI | Classification |
|---|---|
| < 18.5 | Underweight |
| 18.5–24.9 | Normal |
| 25–29.9 | Overweight |
| ≥ 30 | Obesity |
Project Creation

PowerShell Commands
cd C:\ReactAppsmkdir bloco02cd bloco02npm create vite@latest app35-bmi-calculator -- --template react-tscd app35-bmi-calculatornpm installnpm install @fluentui/react-components @fluentui/react-icons
This creates a React + TypeScript project using Vite.
Why Vite Matters
Vite is the build tool responsible for:
- development server
- JSX transformation
- TypeScript compilation
- module resolution
- Hot Module Replacement
- production build optimization
The project roadmap standardizes all apps using:
- React
- TypeScript
- Vite
- Fluent UI
This standardization is defined in the project structure documents.
Creating the Folder Structure
PowerShell
mkdir src\componentsmkdir src\modelsmkdir src\utilsmkdir src\styles
Create files:
New-Item src\components\BmiCalculatorCard.tsx -ItemType FileNew-Item src\models\BmiClassification.ts -ItemType FileNew-Item src\utils\bmiUtils.ts -ItemType FileNew-Item artigo.md -ItemType File
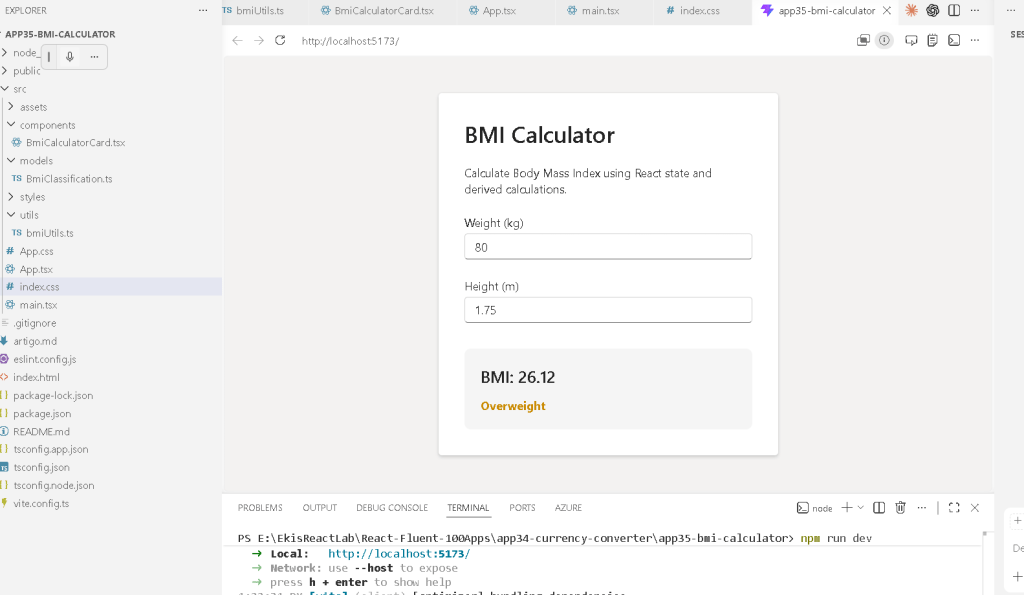
Final Project Structure
src/ components/ BmiCalculatorCard.tsx models/ BmiClassification.ts utils/ bmiUtils.ts styles/ App.tsx main.tsx index.css
This structure follows the architectural standard defined in the project roadmap.
Understanding the Architecture
The application flow becomes:
main.tsx ↓App.tsx ↓BmiCalculatorCard.tsx ↓bmiUtils.ts
Each file has a specific responsibility.
The Role of main.tsx
The file:
src/main.tsx
is the React entry point.
import React from "react";import ReactDOM from "react-dom/client";import { FluentProvider, webLightTheme,} from "@fluentui/react-components";import App from "./App";ReactDOM.createRoot( document.getElementById("root")!).render( <React.StrictMode> <FluentProvider theme={webLightTheme}> <App /> </FluentProvider> </React.StrictMode>);
This file performs several critical tasks:
| Responsibility | Purpose |
|---|---|
ReactDOM.createRoot() | Mount React into HTML |
StrictMode | Detect unsafe patterns |
FluentProvider | Activate Microsoft design system |
webLightTheme | Apply Fluent UI light theme |
<App /> | Render root component |
How React Enters the Browser
The browser first loads:
index.html
Inside it exists:
<div id="root"></div>
React finds this element:
document.getElementById("root")
Then React injects the entire application into that container.
Flow:
index.html ↓main.tsx ↓ReactDOM.createRoot() ↓<App /> ↓Components ↓Rendered HTML
This is how React becomes visible inside the browser.
The Role of App.tsx
import { BmiCalculatorCard } from "./components/BmiCalculatorCard";function App() { return ( <main style={{ minHeight: "100vh", display: "flex", justifyContent: "center", alignItems: "center", backgroundColor: "#f3f2f1", }} > <BmiCalculatorCard /> </main> );}export default App;
This component is responsible for:
- page layout
- centering
- viewport sizing
- root composition
The component hierarchy becomes:
App ↓BmiCalculatorCard
The Role of BmiCalculatorCard.tsx
This is the main business component.
It contains:
- state
- inputs
- calculations
- rendering logic
- visual composition
Understanding useState
The component contains:
const [weight, setWeight] = useState("80");const [height, setHeight] = useState("1.75");
This is React state.
State means:
Persistent component memory between renders.
Breaking Down useState
const [weight, setWeight] = useState("80");
contains three parts:
| Part | Meaning |
|---|---|
weight | current state value |
setWeight | update function |
"80" | initial state |
When the user types:
85
React updates state automatically.
Controlled Inputs
The input field is:
<Input value={weight} onChange={(_, data) => setWeight(data.value) }/>
This is called a:
Controlled input
React fully controls the input value.
Flow:
User types ↓onChange fires ↓setWeight() ↓State changes ↓React re-renders ↓Input receives updated value
This is one of the most important React concepts.
Why Inputs Return Strings
HTML inputs always return strings.
Even numeric-looking values are strings:
"80""1.75"
That is why we convert:
Number(weight)Number(height)
before calculations.
The Numeric Conversion
const weightValue = Number(weight);const heightValue = Number(height);
Without this conversion:
"80" + "5"
would produce:
"805"
instead of:
85
Numeric conversion is essential in forms.
The Most Important Concept: Derived State
The BMI value is calculated like this:
const bmi = calculateBmi( weightValue, heightValue);
Notice something important:
BMI is NOT stored in state.
This is extremely important.
Wrong approach:
const [bmi, setBmi] = useState(0);
Correct approach:
const bmi = calculateBmi(...);
Why?
Because BMI can always be derived from:
- weight
- height
According to React Learn:
- duplicated state creates bugs
- derived values should be calculated
This follows:
Why No useEffect Exists
The application intentionally contains NO:
useEffect(...)
Why?
Because no external synchronization exists.
We are only calculating values during rendering.
This is one of the most important lessons in modern React.
Many beginners incorrectly write:
useEffect(() => { setBmi(...)}, [weight, height])
This is unnecessary.
React recommends calculating directly during rendering whenever possible.
The Role of Utility Functions
The calculations are separated into:
src/utils/bmiUtils.ts
This file contains:
export function calculateBmi(...)
and:
export function getBmiClassification(...)
This separation is extremely important architecturally.
Why Separate Logic from UI
The component should focus on:
- rendering
- interaction
- composition
Utility files should focus on:
- calculations
- business rules
- reusable logic
This separation improves:
| Benefit | Explanation |
|---|---|
| readability | cleaner components |
| scalability | easier growth |
| testing | isolated logic |
| reuse | functions reusable elsewhere |
| maintainability | smaller responsibilities |
The Role of the TypeScript Model
The file:
BmiClassification.ts
contains:
export interface BmiClassification { label: string; color: string;}
This defines the structure of the classification object.
TypeScript guarantees:
Every classification must contain:- label- color
This improves:
- autocomplete
- safety
- architecture
- refactoring
The React Render Cycle
One of the most important concepts introduced by this app is:
React automatically re-renders when state changes.
Flow:
User types ↓setWeight() ↓React schedules render ↓Component function executes again ↓BMI recalculates ↓UI updates
No manual DOM update exists.
Declarative UI
React is declarative.
You describe:
What the UI should look like
instead of:
How to manually manipulate the DOM
This is one of the central React Learn principles.
The Fluent UI Components
The application uses:
| Component | Purpose |
|---|---|
Card | Container |
Field | Accessible form wrapper |
Input | Enterprise text input |
Text | Typography |
Title2 | Section title |
Fluent UI provides:
- accessibility
- spacing
- typography
- keyboard navigation
- Microsoft visual standards
Why Fluent UI Matters
Using Fluent UI means:
You do not manually recreate enterprise controls.
Instead, you compose enterprise-ready components.
This aligns with the project roadmap using Fluent UI as the standard design system.
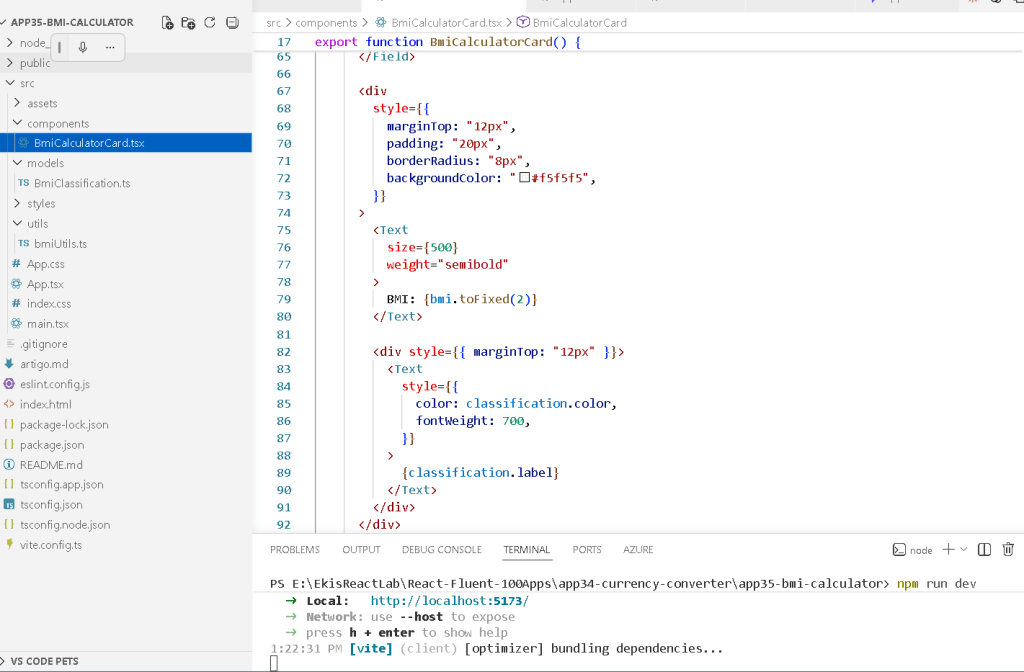
Understanding Conditional Rendering
The classification changes dynamically:
<Text style={{ color: classification.color, }}> {classification.label}</Text>
React recalculates:
- label
- color
based on BMI.
This creates dynamic UI.
Production Validation
Run the development server:
npm run dev
Validate production build:
npm run build
Preview production:
npm run preview
The build step validates:
- TypeScript
- JSX
- imports
- dependencies
- production bundling
What This App Really Teaches
Visually:
It looks like a simple calculator.
Architecturally:
It teaches the correct React mental model.
The most important lessons are:
| Concept | Importance |
|---|---|
useState | component memory |
| controlled inputs | React-driven forms |
| derived state | avoid duplicated state |
| render cycle | automatic UI updates |
| utility functions | separation of concerns |
| TypeScript | safe architecture |
| Fluent UI | enterprise components |
| declarative rendering | React philosophy |
Technical Summary
| Technology | Purpose |
|---|---|
| React | Declarative UI |
| TypeScript | Static typing |
| Vite | Build tool |
| Fluent UI | Microsoft design system |
useState | State management |
| Controlled Inputs | Form handling |
| Derived State | Calculated values |
| Utility Functions | Business logic |
| JSX | UI syntax |
| Flexbox | Layout |
Official Documentation
React
- React Learn
- State: A Component’s Memory
- Choosing the State Structure
- Reacting to Input with State
- You Might Not Need an Effect
Fluent UI
Vite
TypeScript
Current Project Progress
| Block | App | Name | Status |
|---|---|---|---|
| Block 1 | 01 | Hello React Fluent | Completed |
| Block 1 | 02 | Profile Card | Completed |
| Block 1 | 03 | Product List | Completed |
| Block 1 | 04 | Microsoft Style User Card | Completed |
| Block 1 | 05 | Static Dashboard | Completed |
| Block 1 | 06 | Corporate Sidebar Menu | Completed |
| Block 1 | 07 | Visual Task List | Completed |
| Block 1 | 08 | Timeline Events | Completed |
| Block 1 | 09 | Employee Table | Completed |
| Block 1 | 10 | Email List | Completed |
| Block 1 | 11 | Grid of Cards | Completed |
| Block 1 | 12 | Image Gallery | Completed |
| Block 1 | 13 | Movie Catalog | Completed |
| Block 1 | 14 | Football Teams | Completed |
| Block 1 | 15 | News Page | Completed |
| Block 1 | 16 | Financial Dashboard | Completed |
| Block 1 | 17 | SharePoint Layout | Completed |
| Block 1 | 18 | File Explorer | Completed |
| Block 1 | 19 | Corporate Portal | Completed |
| Block 1 | 20 | Microsoft Landing Page | Completed |
| Block 2 | 21 | Modern Counter | Completed |
| Block 2 | 22 | Toggle Theme | Completed |
| Block 2 | 23 | React Calculator | Completed |
| Block 2 | 24 | Login Form | Completed |
| Block 2 | 25 | User Registration | Completed |
| Block 2 | 26 | ToDo List | Completed |
| Block 2 | 27 | Shopping List | Completed |
| Block 2 | 28 | Product Filter | Completed |
| Block 2 | 29 | Employee Search | Completed |
| Block 2 | 30 | Shopping Cart | Completed |
| Block 2 | 31 | Grade Simulator | Completed |
| Block 2 | 32 | Inventory Control | Completed |
| Block 2 | 33 | Contact Agenda | Completed |
| Block 2 | 34 | Currency Converter | Completed |
| Block 2 | 35 | BMI Calculator | Current |
| Block 2 | 36 | Installment Simulator | Next |
